Dreaming of a Custom Boat Part 3: Splashdown!
December 13th, 2022 by team
by B.J. Porter (Contributing Editor)
Over the last two months we’ve talked to Jim Betts and some of his staff from Betts Boats in Anacortes about custom boat building. We’ve taken you from dreaming and kicking tires (Part 1) to building a hull and deck (Part 2). Now, it’s time to finish the boat and launch her!
When we left you last month, we had a finished hull with all the stringers and bulkheads in place, and a deck ready to install. The hull was painted, faired, and flipped and ready to install the interior. Now, the detail work needs to be done, and that can take much longer than the work done to date.
“The hull, deck, and larger components come pretty straight off the drawings,” says Betts in-house designer Will Porter. “But once you start fitting in cabinetry and systems, there’s a lot more adjustment and custom fitting.”
Building the hull and deck is a big job, but the true detail work is just beginning.
Starting from the bottom up
After they flip the hull and stabilize, the Betts crew starts on the boat systems and interior. They start from the bottom up, with the lowest systems in the boat first.
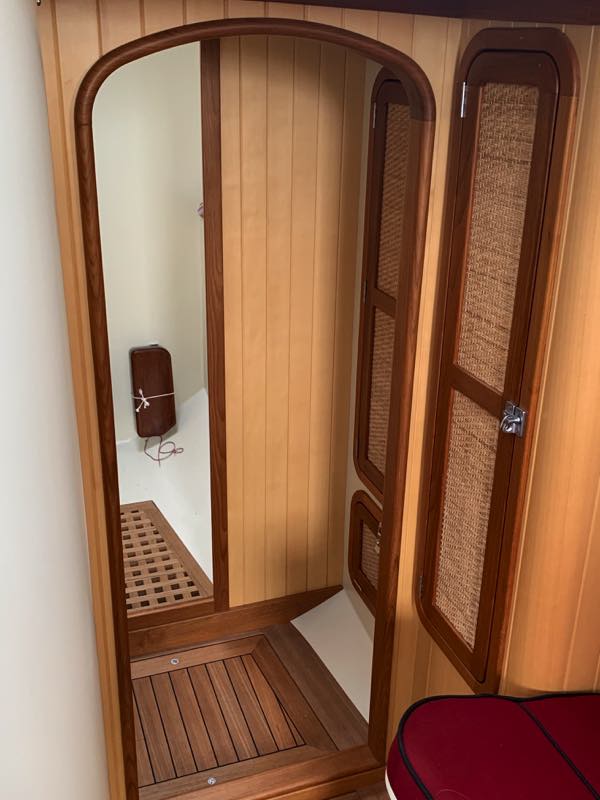
The tankage is the lowest element in the boat over the keel, so they install tanks before any flooring or floor supports. Floor supports follow, then construction of interior joinery, and lower cabinetry. The installation of interior cabinetry and woodwork can only go so high, as anything that touches the ceiling of the cabin can’t be built until they put the deck on.
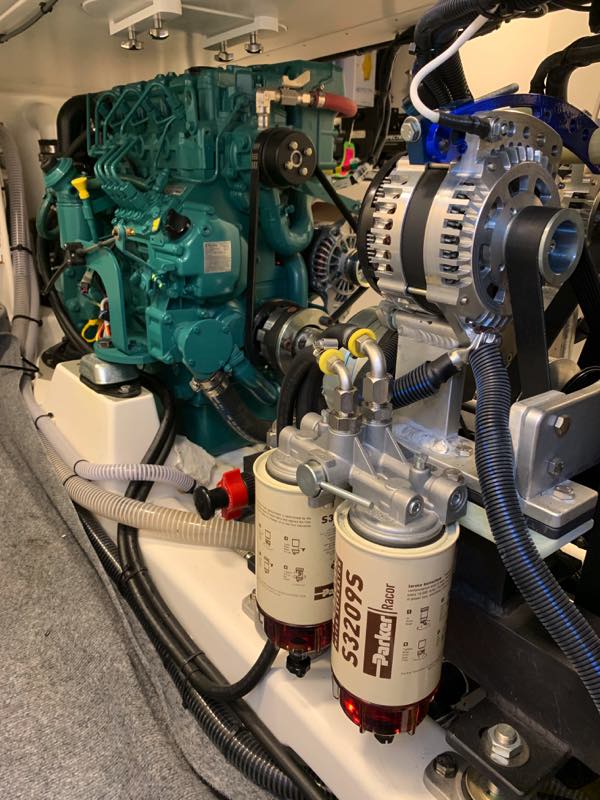
Engines, steering, and mechanical systems go in at this early stage, before any cabinetry or woodwork goes around them.
Owner involvement and choices are a big factor in the interior construction, and they make most design and style choices well before the actual installation in the hull. By the time hull construction is complete, most interior design choices are set and equipment is ordered. Some special order or custom pieces may take some time to arrive, so locking in the visual style early is important to interior completion isn’t delayed.
They assemble the interior with a mixture of adhesives and mechanical construction with screws and nails. The construction team works to build everything they can without the deck until finally it must be installed.
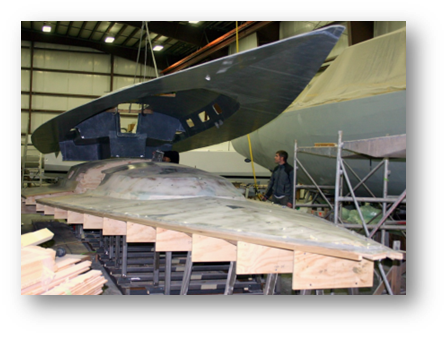
Putting on the Deck
The deck is usually, but not always, constructed in one piece from a single mold. Sometimes they mold more challenging shapes like cockpits separately, and put them together when the deck is installed.
For the hull deck joint, Betts uses a composite joint, effectively turning the hull and deck into a single piece of carbon fiber laminate. They don’t do a mechanical join with bolts or screws, since the laminated joint is strong enough on its own.
Once the deck is lowered and joined, then construction down below is finished up to the deck level. If they built the deck in multiple pieces, not all of them need to go on right away to keep access easy.
Wiring and Electrical Systems
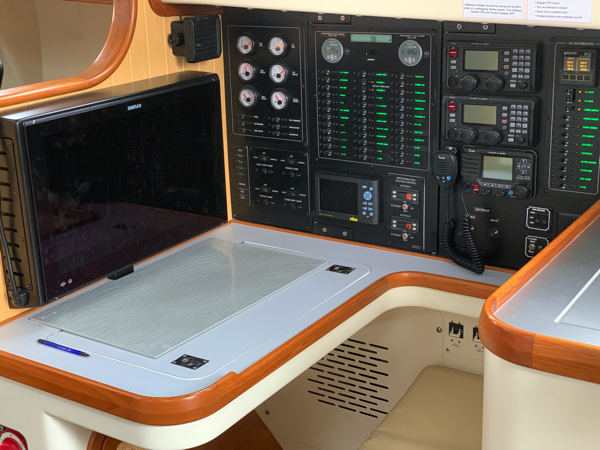
Electrical wire runs aren’t made until after the furniture and cabinetry is installed. The reason is simple – it’s easier to cut holes behind and through the back and bottom of the cabinetry as needed than it is to force carpenters to work around wire bundles. The cabinetry and interior space need to be correct, so the wiring is fit in around it and hidden when it is built, though raceways and conduits may be put in place beforehand.
Just like the fittings and interior décor, the instruments and electronics are selected and ordered well before they’re needed, so they’re on hand when it’s time for installation.
Deck and Rigging
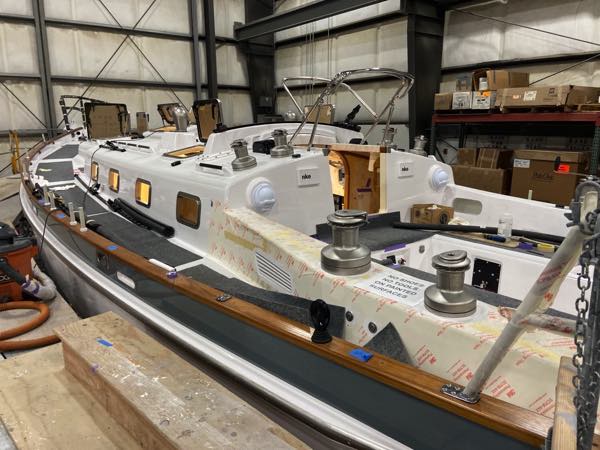
The mast and standing rigging are designed and built off site by a spar specialist, and delivered to Betts for installation before launching. The chain plates and structural elements are integral to the hull, but they cannot put the rig and spars on while the boat is in the shed.
Once the deck is on, the crew starts installs the winches, blocks, line organizers, and any cockpit trim or details. Hatches and lazarettes which need to be cut are handled, and covers and doors are fit.
Installing the keel and rudder
Unless the boat has significant interior ballast like the Bulletproof project we talked about in the other articles, the keel installation is the last step in the build. It’s safer to secure a hull without a keel in position to work on, and it’s easier if the deck isn’t an extra eight to ten feet (or more) off the floor with the keel attached.
The keel attachment point on the hull is thick, and solid, un-cored carbon fiber. It’s thicker than the rest of the hull, and on larger boats like the Stephen’s-Waring 68 that’s in process now, may be two over inches (51mm) thick!
Stocky bolts embedded in the keel are threaded through the hull and a backing plate, and a massive amount of bonding compound joins the hull and keel. The nuts are threaded on the bolts and torqued, then the joint is faired in and the bottom given its final paint job.
With the keel on and the boat raised, the rudder is installed.
Testing and finishing
“Systems testing during the construction process is super important,” says Betts. “We want a 99.9% completed boat before it rolls out of shop, because it takes four times the man hours to complete the work once the boat’s in the water.”
Throughout the build process, they test systems as thoroughly as possible to make sure nothing needs to be fixed down the road. The finish work is often detail work, and it all needs to be complete before the boat moves for rigging.
Before the rig can go on the boat, it’s moved outside, as the roof and door is too low in the production shed. Once the rig is stepped and they test everything once more, the boat is effectively done. But Betts isn’t done with it.
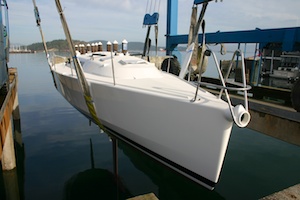
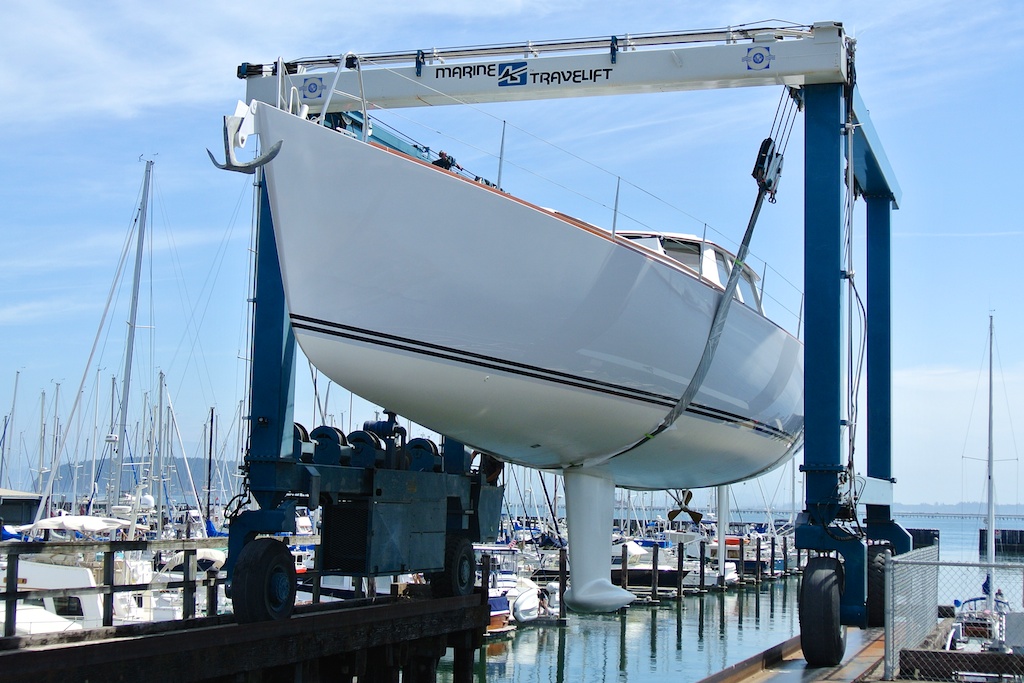
They pick the completed boat with a travel lift and launch it in a nearby yard. There, they will check it to be sure that all seals are tight, nothing leaks, and it floats on its lines as designed.
Sea trial
The final pre-delivery step is the sea trial. This is done by the construction and design staff at Betts, and the boat is put through its paces. They start the engine and run up to speed, bend on sails and sailed it hard as conditions permit. They make sure everything is holding up to design and specification.
A surveyor may also attend the sea trial, to give the last seal of approval that the delivered boat meets safety standards and is ready for the client.

Delivery to the client
As the boat is being built, the systems engineer works with the design team and office staff to develop an owner’s manual for the boat. This document is unique to each boat and covers every single system and aspect of operating the custom vessel.
In most cases, the client will take delivery of the boat in Anacortes, and have a delivery crew bring it to its new home port if the owner isn’t planning to deliver it themselves.
The Betts crew gives the new owner a walkthrough, delivers the manual and the keys, and they deliver a new custom dream boat!

December 14, 2022 at 6:50 pm, Paul said:
I’m curious about two things. First, when I install stereo stuff, often the listener wants everything hidden – preferably behind walls. But things need maintenance, upgrades, and changes. Is the boat built so there is access to everything; even those tanks at the bottom of the boat?
Second, it seems balance might be important too. In the process of building is there any point where the center of gravity is ascertained to make sure it is at the optimum location?
December 15, 2022 at 12:51 am, B.J. Porter said:
Interesting questions, I’ll pass them on to the Betts folks and see what they say.
December 15, 2022 at 4:16 am, Roy a gorman said:
Lovely approach to a really complicated process. Every thing is spot-on, as far as I am concerned.