Dreaming of a Custom Boat, Part 2: Building Starts
November 9th, 2022 by team
by B.J. Porter (Contributing Editor)
Last month we featured the first part of our series on building a custom boat. We spoke to Jim Betts from Betts Boats in Anacortes, Washington and poked around the shop looking at the works in progress. We spoke about the design process and decision making about sizing and budgets.
This month, we’re going to lay down some carbon fiber and epoxy and start building a boat! But first, we have to make some tooling.
First Steps – Tooling
Have you even wondered how they make those smooth curves and cool shapes out of fiberglass? The simplest description is that the builder makes a mold, then presses fiberglass and resin into the mold to make the shape. We collectively call those molds tooling.
Every part of a fiberglass boat that isn’t a flat surface needs tooling, from the hull to fiberglass steps, cockpits, and all those shaped counters and cabinets in the galley and heads. Tooling is build from a variety of materials, but it has to be made for every fiberglass component.
Before they lay any fiberglass up or any structures made, they design and make the tooling. In essence, they take the CAD drawings of the boat, break it up into the component buildable parts, then invert those parts into the molds to make them. Then they build the molds, and after that they can make the parts and put them together into a solid, 3-D object.
Tooling Types
There are two types of molds used in shaping fiberglass – male and female. The major difference is which side of the mold is used to shape the fiberglass. For a male mold, they put the composite materials around the outside of the mold. The surface of the mold is in contact with the inside of a hull.
The opposite us true of female molds; they lay fiberglass up inside the mold. Betts uses mostly male molds for hull construction, though female molds are very popular with production builders who use gelcoat on their boats. But it’s much easier to fair a male mold, because you’re sanding and filling a convex surface.
They will make tools for the hull first, and later on the deck and all the fittings and pieces that are put into the boat.
Making Tooling
Tooling itself is a significant cost of building a custom boat – about one third the cost of the entire build. There is a significant design effort in creating the tooling, as they must build the tooling in an inverse molding of the finished product. Betts’ in-house designer, Will Porter, spends a significant part of his day with tooling designs, getting everything just right.
“You need to make the parts from the line drawings and models,” Porter says, “and make them so they line up right when the boat is assembled. Sometimes the geometry of the designs we get aren’t so easy to build, so we need to make some tweaks to get everything together.”
Big production boat companies may build hundreds of large boats off their tooling investment, and production boat tooling used repeatedly may involve in upfront investment in the millions of dollars. For a one-off custom boat, they may only use once the tooling so it doesn’t need the same durability.
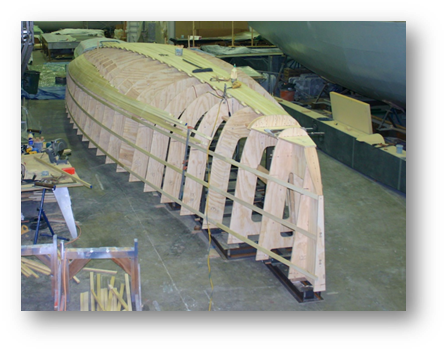
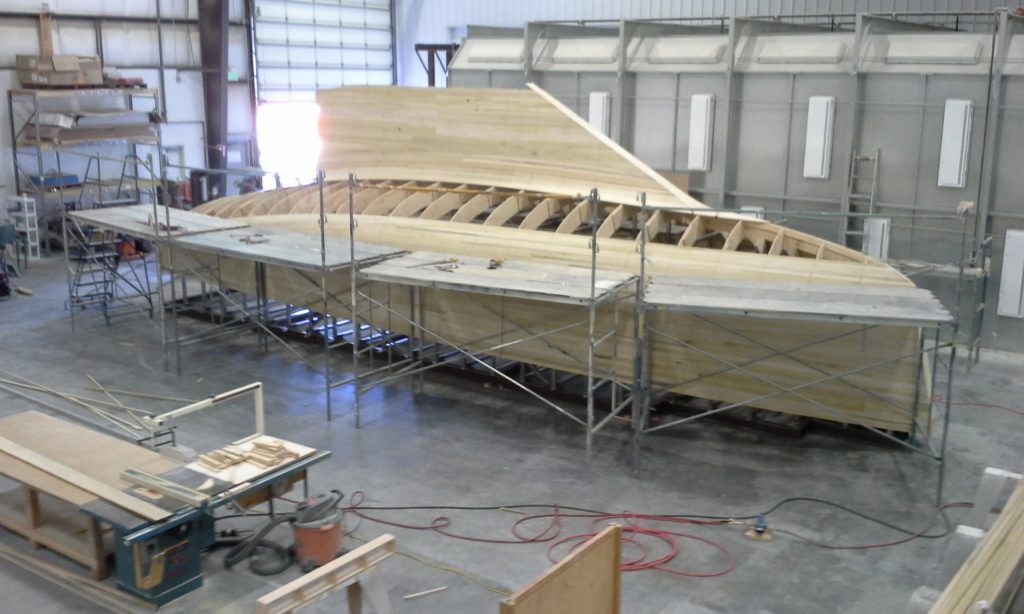
Betts Boats makes male hull tooling from steel and plywood framing, then strip planks it with poplar battens to get the hull curves. Then they fill the surface and faired it to the smooth shape needed for the layup. They may cut other tooling for smaller parts with a CNC (Computer Numerical Control) cutter from blocks of dense foam.
It takes a lot of time and materials to get all the tooling right, and it has to be near perfect or the pieces won’t go together.
Tooling, Payment Schedules, and Taxes
They usually billed the tooling on a completely different payment schedule than the rest of the boat. It’s billed as a separate item in time and materials projects, and tied to deliverable milestones in fixed-price contracts. There’s an interesting reason for it – taxes.
“Tooling is considered a locally delivered and used product,” Jim Betts says. “so the state and local sales taxes apply. But you take delivery of your boat and register it in your home state or country, and pay taxes on it there.”
So the tooling, which will never leave the shop grounds and is often a consumable part of the project, is subject to local sales tax. But the finished boat will be taxed wherever the buyer eventually registers and berths it.
Laying up the Hull
Building from a male plug, the laminators are working from the inside of the boat out. Most of the boats Betts builds are cored carbon fiber and epoxy composite, meaning a core of foam or other lightweight material inside two skins carbon fiber cloth soaked with epoxy resin. Some load bearing parts of a hull may be solid composite without the core, but cored construction results in a lighter, stiffer material.
Traditional hand layups involve placing layers of fibers down, wetting them with resin, rolling out the air bubbles, then repeating across the boat as the hull is complete. But traditional layup leads to uneven resin application, an increased risk of voids, and a heavy use of resins. Extra epoxy resin does not actually lead to a stronger boat, and there are optimal ratios of resin-to-fiber that give the best results.
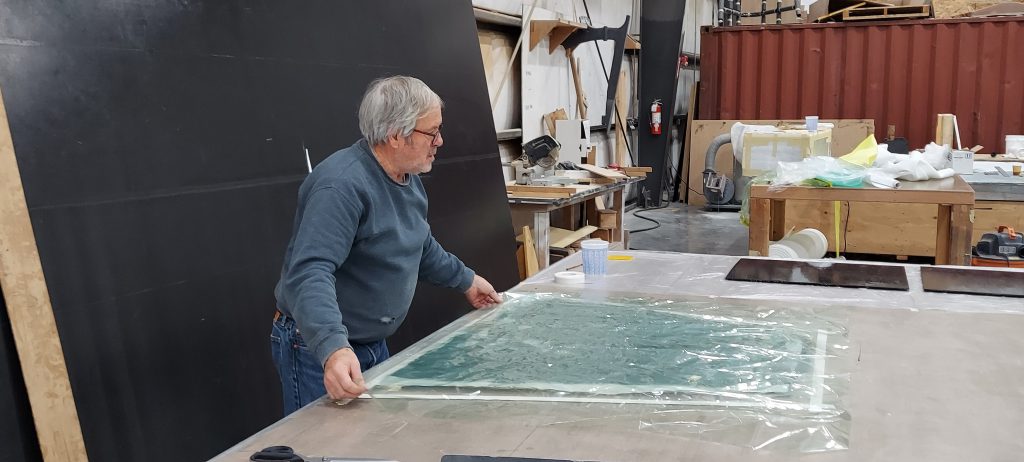
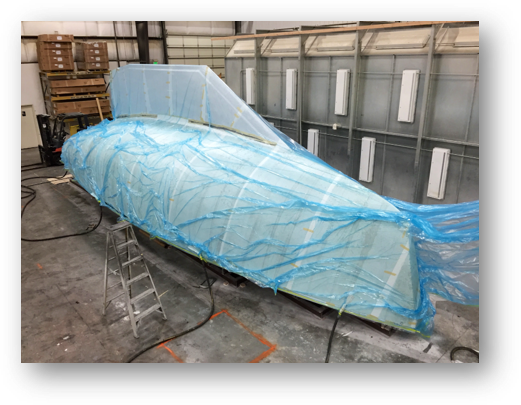
For better lamination, Betts uses vacuum bagging for most of its lamination. A “wet stack” of layers fiber cloth and resin is put on the mold, covered with plastic, then sealed. A port in the plastic connects to a pump which sucks all the air out of the stack. This eliminates most voids in the composite and draws out much of the excess and unneeded resin.
For some projects and smaller pieces, they may us resin infusion, which is like vacuum bagging but for two key differences. First, they stacked the cloth materials dry on the mold. Second, on the opposite side of the bag from vacuum port, a tube is run to a bucket of resin. When the vacuum pump turns on, it sucks resin from the bucket and through the dry stack of cloth. When cured, this gets an even better result, but is more difficult to set up on a larger scale.
Building in Layers
They lay the hull up in several layers of vacuum bagged materials. First, the inner skin of the boat is laid on the mold and laminated. After that, they laminate the core material on to the inner skin.
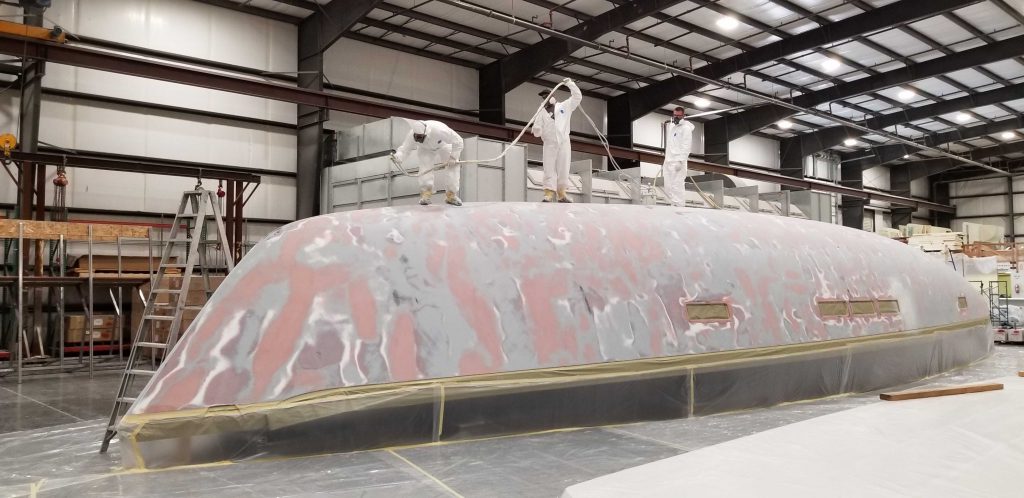
Once the core cures, it is sanded and faired as well as possible prior to laying on the outer skin. The smoother the core is before the next layer, the easier it will be to fair the outer layer when the hull is complete.
Finally, the outer layers are bagged on and cured. Then they fair the outer layer – low spots are filled, high spots are sanded – until the hull has smooth clean finish for painting.
Betts Boats uses paint instead gelcoat on most of their projects for several reasons, one being you have to use a female mold for gelcoat with a completely different layup schedule.
Multi-Threading the Project
As we mentioned last month, on time and materials projects, you don’t need a complete design of the boat when the hull is being laid down. Many things besides laying up the hull will happen alongside once the building starts.
If the interior and deck designs aren’t done, they will proceed as the hull tooling is being made and the hull built. Tooling for the deck will also start and may run parallel once that design is complete, as well as tooling for other parts like rudders or interior fittings.
The pace at which these processes move forward depends on a lot of variables, from availability of labor and materials, to how long it takes the client and designers to make the design decisions on the next steps in construction. As the hull comes together, so do the details about bulkheads, internal fixtures, boat systems, and rigging.
The entire process is far from linear – there may be several parts of the boat in process at once, or being built in parallel. Throughout this, supplies, fittings, machinery, instruments, electrical systems, and other key construction elements are specified and ordered as needed.
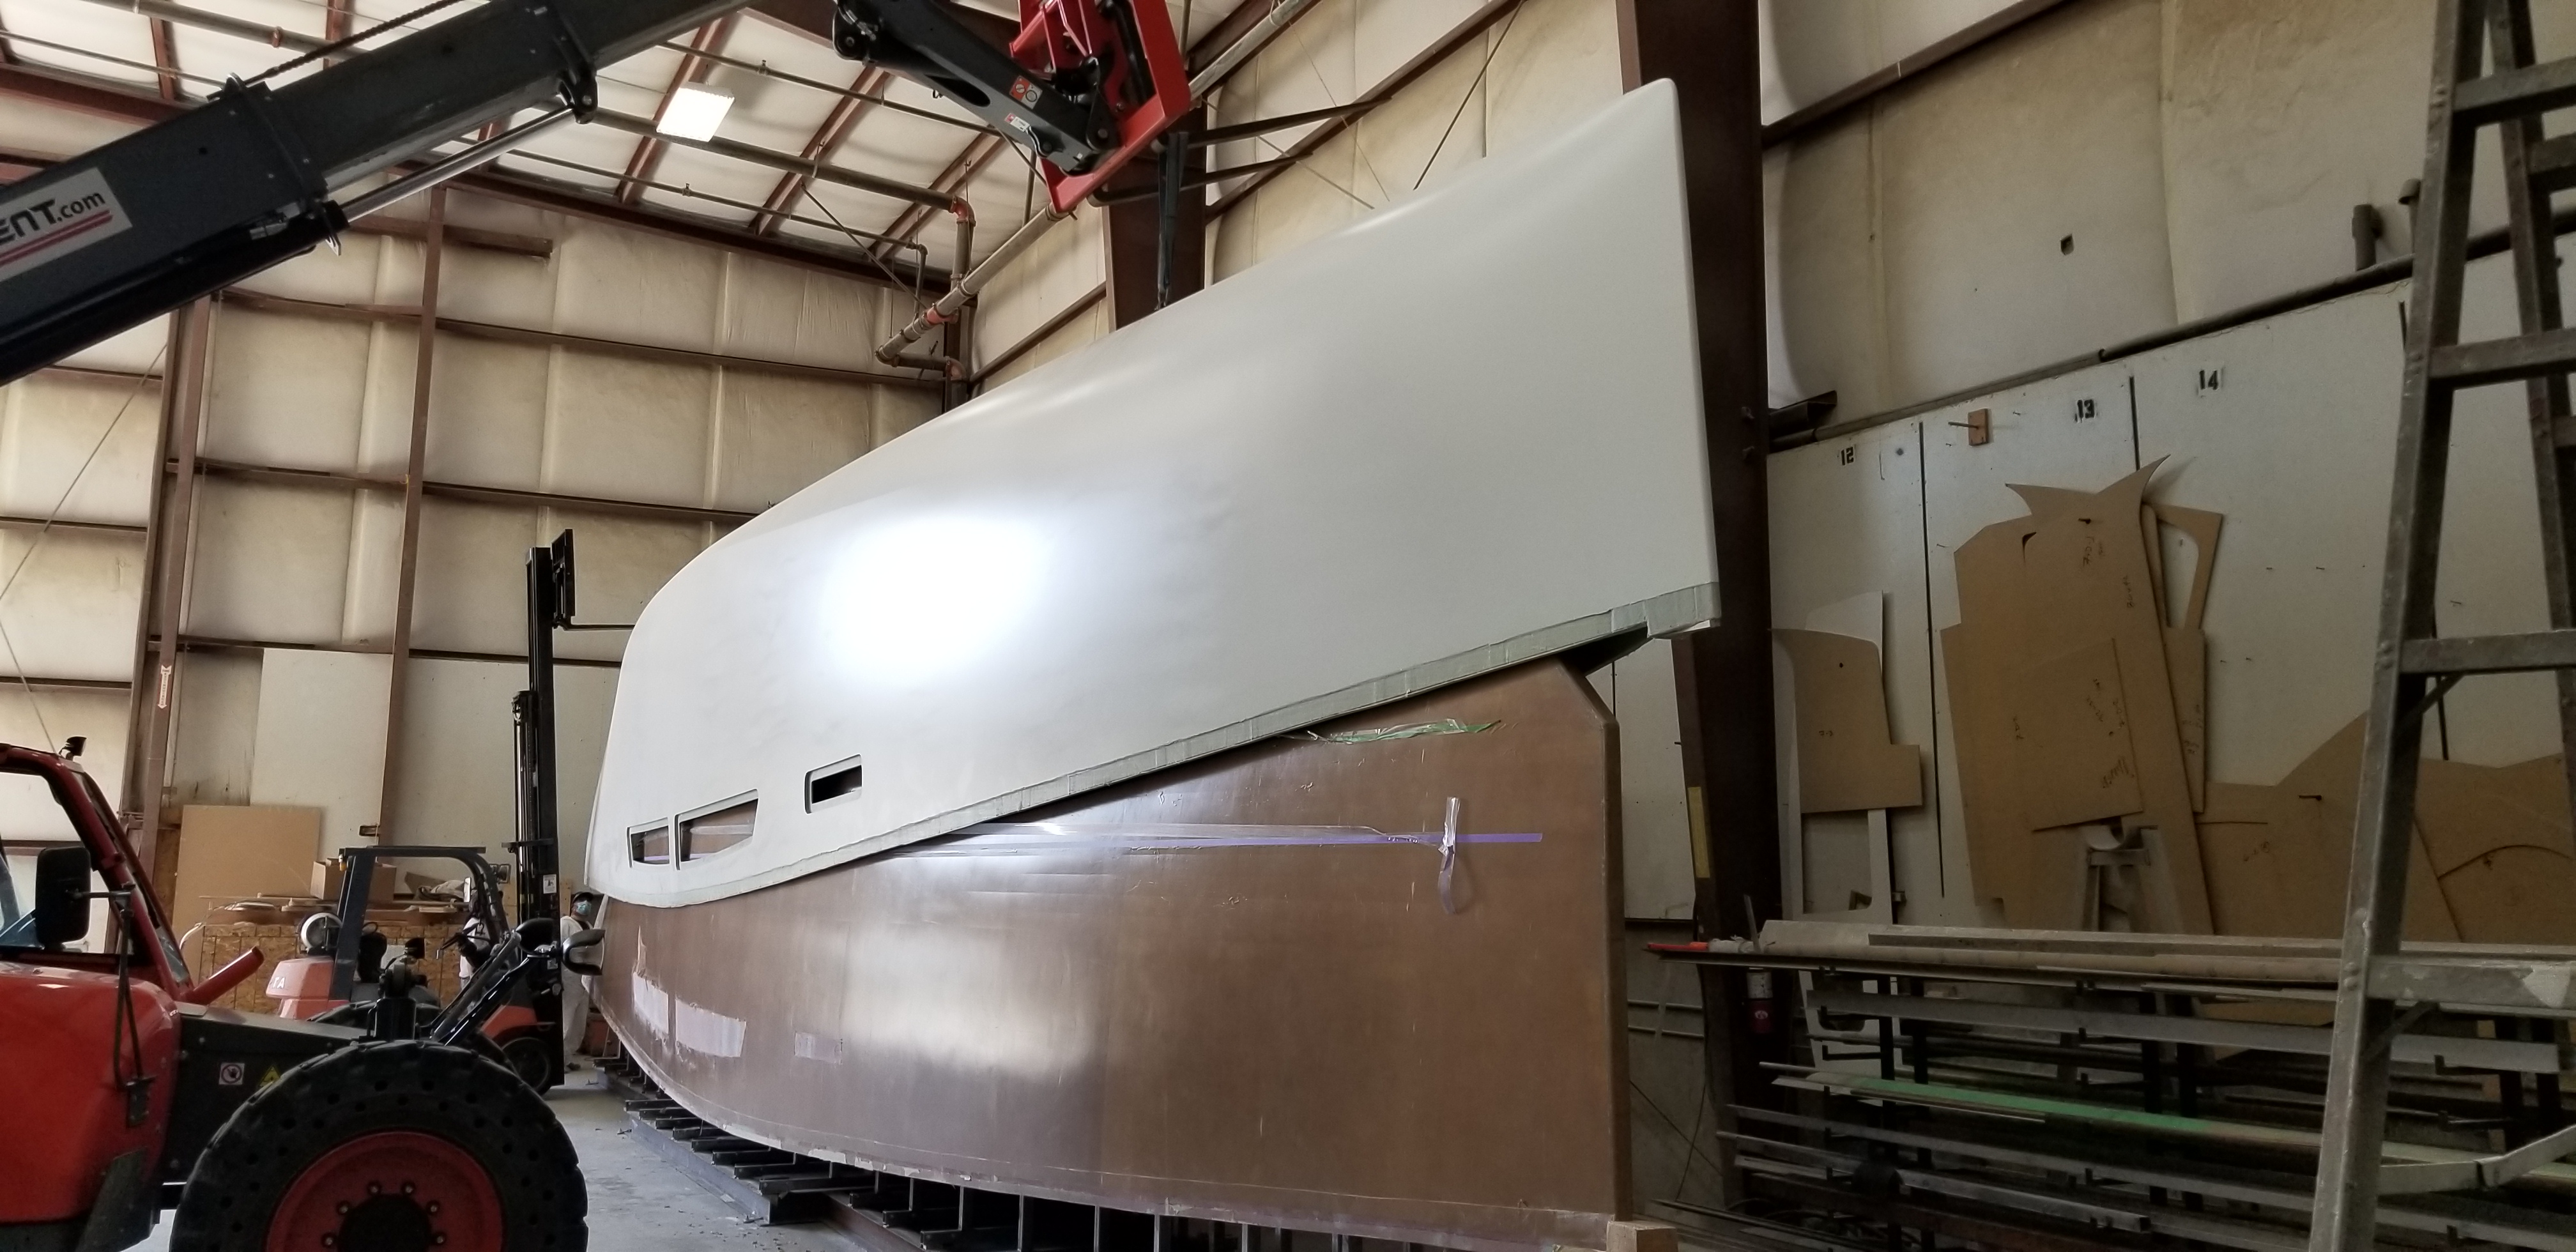
Building in the Upside Down
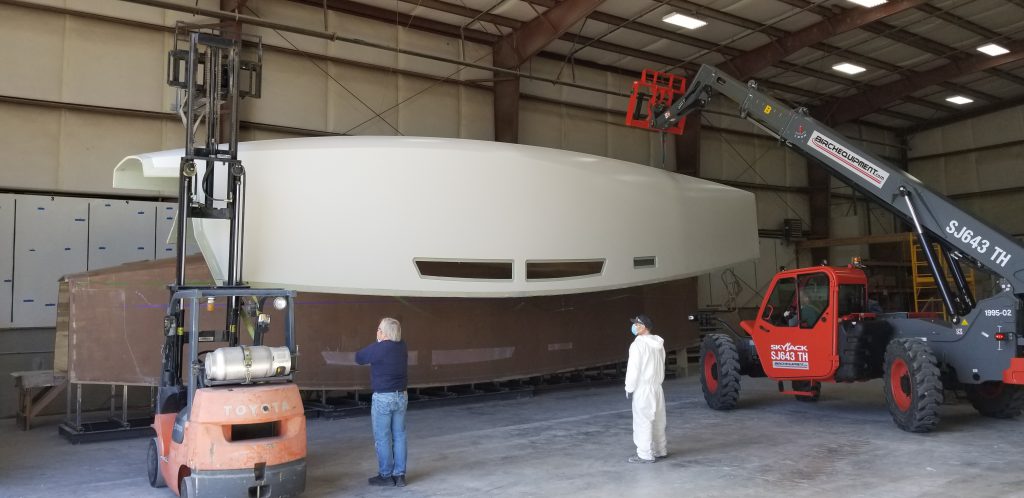
When the hull is finished and faired, it’s removed from the mold and secured upside down, with the bottom facing the ceiling and space to work underneath.
“We’ve learned it’s much easier to work up than down,” Betts says. “When the boat is keel down, gravity works against you. It’s tough to get the boat level, and that makes it harder to fit things into angled or rounded spaces.”
Working underneath the overturned hull, the workers install all the stringers, bulkheads and bracing. When they’ve installed as much as they can from below, they flip the hull.
While construction is done from lightweight materials with techniques to reduce weight and keep it light, a forty to sixty foot carbon fiber hull is still a heavy, bulky object to manipulate. Turning a hull is a major milestone in a project, and it takes most of the crew with a lot of extra equipment and a lot of care.
Building and Attaching the Deck
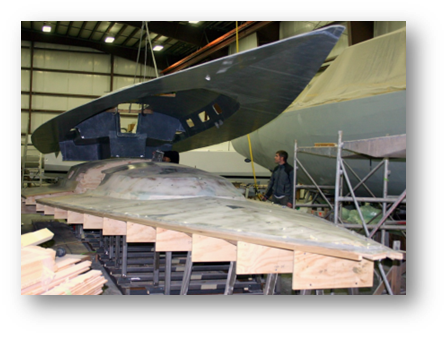
The deck tooling is usually underway while the hull is coming together, with the goal of having the deck ready some time after the hull is flipped. Even once the hull is flipped, there’s much to be done inside it. They try to install as much as they can before deck attachment, because once the deck is down all work needs to be done through the companionway. It’s much easier to work machinery and systems in through an open deck.
Throughout this process, there is a constant flow of tooling being built for making the fittings and parts as the boat comes together, and work may proceed inside the hull as the deck comes together as well.
Eventually, the deck is laid up in its tooling and made ready to install on the boat. But we’ll get to that next month…
Project Management: Fixed Price vs. Time and Materials
The general build process we’ve described is for boats on a time and materials basis. While the steps to complete the boat are the same in the end, the business model for the build can affect the building timeline.
“The original model for fixed price had payment points, like releasing the hull from the mold or attaching the deck to the hull,” Betts said. “But that model lead to some rush to those points, like attaching the deck, and that would make the whole project harder.”
It’s one of the big reasons Jim prefers time and materials projects, because with regular payments on the boat, the workflow isn’t artificially constricted to a payment schedule. Over the years he’s learned to structure those contracts to not constrict the build and leave in a little flexibility.
“The customer is involved in every step of the way, from the design to any changes we make during the build,” Betts adds. “Change management can be a bit of a process in a fixed price project, so T&M is a little easier to manage on that end.”
What’s clear is that while a fixed price boat can keep you on a fairly close budget, you have to think it all through and make sure the milestones and structure of the contract make sense beside the build process.
The Next Steps
With the hull and deck built, there’s still a lot more to do to finish the boat. Next month, we’ll attach the deck, and finish the boat until it’s ready for the survey and seal trial and delivery to the client.

November 11, 2022 at 7:13 pm, Steven Hess said:
One thing that seems to be an afterthought on every boat I have owned up to 36 ft. is stuffing all mechanical things in an open hull during construction is easy. But servicing a fresh water pump or a bilge pump can be a frustrating job for the owner or marina on a finished boat with the deck glued in place forever. Once you get to an engine room size boat it’s usually straight forward but on small craft a constant headache.