Marine Plumbing Tips, What You Need To Know
November 7th, 2023 by team
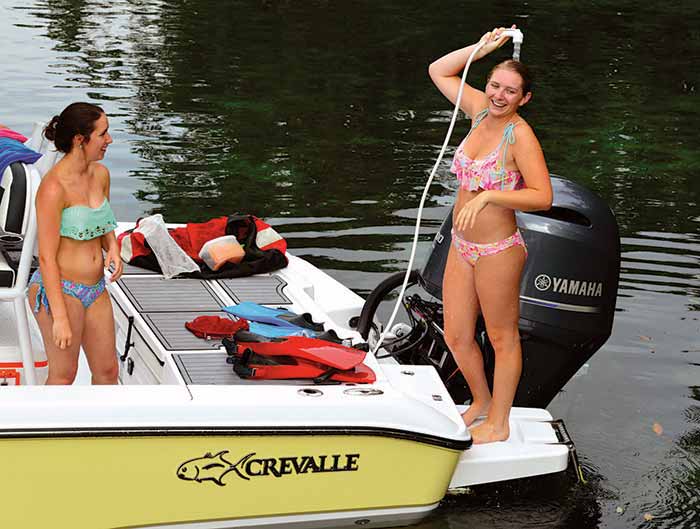
by B.J. Porter (Contributing Editor)
Once upon a time, a more naïve boat owner than me asked a service technician “So, do you know any marine plumbers?” That got a good laugh from him. Because unlike plumbing in your house, there’re no pipefitters union, no callout service, and no special trade that does marine plumbing. Boat yards and technicians can help with plumbing, but there are no specialized rooter companies or emergency callout services for boats. (OK, it was me who asked. It was a long time ago, and I needed help!)
One reason is that every boat’s plumbing is a little different, and there’s no standardization like there is in a house. Believe it or not, there are more complex issues with watermakers, water tanks, holding tanks, vented loops, and so on, and every boat is a unique mix. Boat plumbing systems use the same parts, although they may be arranged differently on similar ships.
We can’t solve your plumbing problems here. But what we CAN do is give you some tips and pointers, so if something goes wrong, you have a chance to fix it. And maybe a chance to be a little more efficient, save a few bucks, and come away with fewer cuts and bruises than I did.
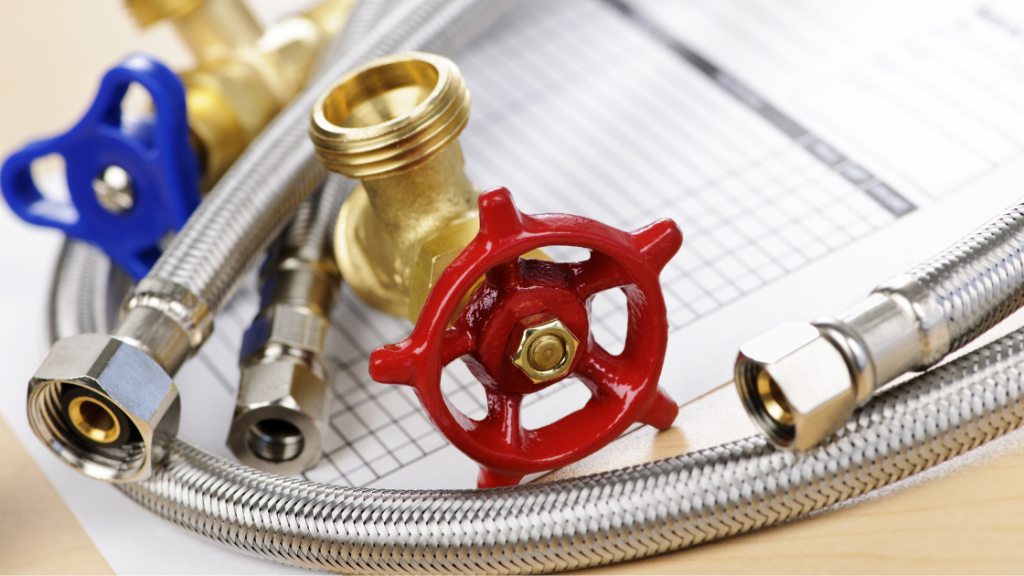
About Hoses and Connections
Houses are square and don’t move, so fixed PVC, PEX plastic or even copper plumbing works pretty well. But boats are weird-shaped and they vibrate a lot. To absorb vibrations and navigate tight spaces, boat plumbing uses hoses, fittings, and clamps.
Know your hoses
Each application requires a specific hose, such as reinforced high-pressure hose for water lines and sanitation hoses for plumbing. You can’t use engine hose to plumb your toilet, it will saturate and smell. And clear, un-reenforced water hose will eventually collapse if you pressurize it. You need the right material, diameter and type for your application.
Since you’re not building your boat, you have an easy guide to what hose you need for replacement – the old hose that failed!
Search the length of hose. Usually there are numbers and letters on it somewhere. They may be a part number with a brand, or even better, a description of the diameter and type of hose. In the worst case, bring a segment of the hose with you to the chandlery. They won’t love you for it if it’s sanitation hose, but you need to match it.
The right diameter
They often give hose with two diameters – the Inner Diameter (ID) and Outer Diameter (OD). For marine hoses, we only care about the ID. When you’re selecting fittings, they’re measured for the ID. So you get hose to match – a 1/2” hose barb needs a 1/2” ID hose.
Be careful when “eyeballing” hoses to get measurements, once the hose is cut in the store, there are no refunds. Measure the opening, or find the numbers on the outside. Measuring a fitting is less reliable because they often have tapered shapes, ridges, or flanges to hold the hose and create a seal.
Do NOT use the wrong size hose with a fitting. A larger hose over a smaller fitting will leak, eventually. This is important if you have SAE (English) diameter fittings and a metric ID hose or the reverse. Sometimes it’s close enough, like a 25mm hose on a 1″ barb. But it’s better to err on the size of too small. If the hose does not fit snugly over the barb, no amount of clamping will guarantee it doesn’t leak.
Working with Hoses
Ever stick your fingers in one of those finger cuff toys and try to pull them out? The toy collapses on your finger, and you can’t get it out. An old hose on a hose barb does exactly the same thing when you try to pull it off!
Getting old hoses off and putting new ones on is half the battle in any plumbing repair, since the fittings need to be tight. Once a hose has sat in place for a few years, it deforms to the fitting, and deposits may build up to help hold it on.
If the hose is trashed, you can easily cut it off with a razor. But if the hose is still good, you’ll want to work it off and reuse it.
A heat gun is your friend
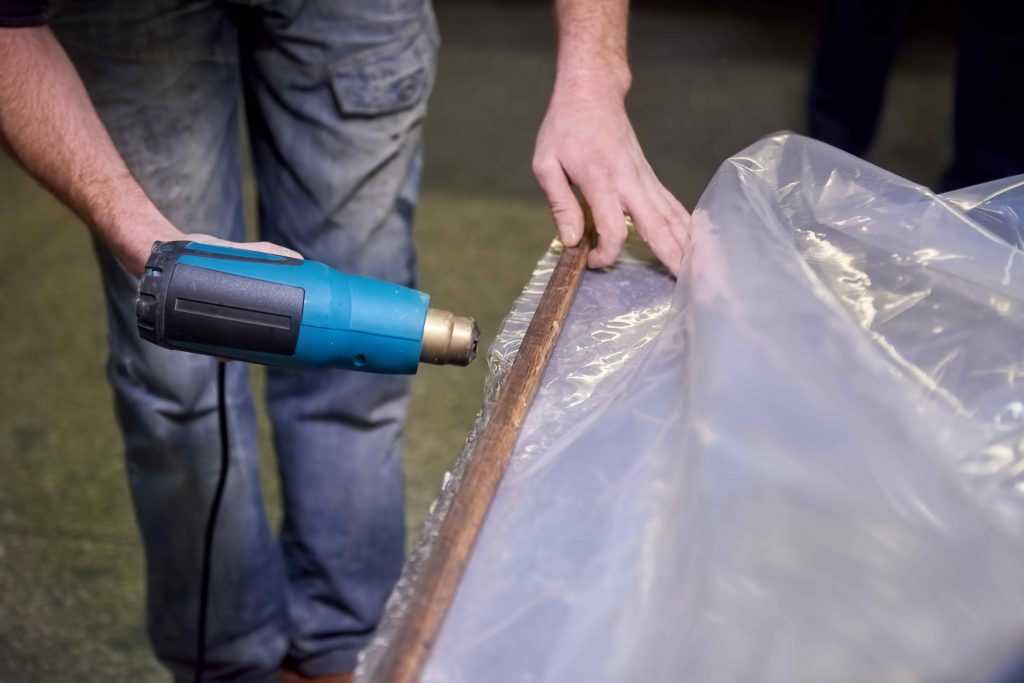
An inexpensive heat gun is indispensable for dealing with hoses. Gentle heat softens most hoses and makes them easier to stretch and work off. Warming the hose can loosen up the “stickiness” some hoses seem to get after a while, too.
You don’t want to melt the hose, which is why you use a heat gun instead of a flame. In a pinch, you could use a hair dryer, but a heat gun is warmer and does a better job. Heat all around the hose, and gently work it off as it softens. You may also gently slide a flathead screwdriver in the hose’s edge to get it going and break the seal, but don’t push it through the hose.
When putting a hose back on, you can reverse the technique. Some hose, especially sanitation hose, is quite stiff and doesn’t stretch well over fittings. But with a gentle warming on the end, and it will stretch right over it and mold in place.
Hose lube
You can buy “hose lube” to help get hoses on, but be careful which lube you buy if it’s not at a chandlery. First, it should be compatible with your hose material. And if it’s for a hose in your fresh water system it should be labeled “food safe.”
Dish soap is also pretty good lubrication, and it’s cheap and readily available. And you know it will be food safe and non-corrosive.
Just rub some of the soap or lubricant on the inside of the hose you’re installing for the first inch.
Hose clamps
Hose clamps can be tricky things and give you a nasty cut if you’re not paying attention to them. A few general tips for using hose clamps:
- Don’t forget to put them on the hose before you push the hose on the fitting. I can’t tell you how many times I’ve worked a hose on a fitting, only to find the hose clamp sitting next to it.
- Do not over tighten. Two bad things can happen. First, you could crush plastic hose barbs. Second, you can strip out the hose clamp and ruin it.
- Do not under tighten. It will leak. You’re looking for the tightest fit you can get without damaging anything.
- Don’t tighten them with a ratchet wrench. It’s tempting to put a socket on them and crank them down, but it’s really easy to over-tighten that way.
- Use a nut-driver handle with the socket instead of a screwdriver for a tighter fit.
- Think about wearing work gloves when dealing with hose clamps. The edges are sharp, and if you tighten with a screwdriver, it’s really easy to slip and cut yourself.
- Tail covers (or end covers) are an excellent investment. These are little rubber caps to go over the sharp ends of the clamps so they don’t cut you. Put them on every hose clamp that you may put your hands, arms or legs near.
Double Clamping Rules
If you’re clamping a hose to a fitting under the waterline, always put two hose clamps on the fitting. The only exception is if the fitting barb is too short, but then you should consider replacing the fitting with a longer barb. Always double clamp all raw water intakes, outflows, and exhaust plumbing, as this is a critical safety issue.
Some will argue that you should put the clamps on opposite directions, or opposite sides of the fitting. The science behind this is less clear. But you should offset the clamp screw barrels enough that you can put the clamps close together. If you can put them on opposite sides of the fitting, well it can’t hurt.
You can single clamp the fittings in your freshwater system, although there is no harm in double clamping them. This will decrease failure rates and leakage.
Hard fittings, joins and tape
Your through-hulls and seacocks will often be made from bronze or Marelon, and you will find other pieces of hard plastic or metal in your system. Hose barbs we’ve talked about, but what about screwing two pieces of hardware together?
Almost all straight screwed-together fittings will benefit from Teflon plumbing tape. This tape will lubricate the threads to allow you to twist them tighter, and it will help seal the threads.
If a joined fitting is leaking, try taking it apart, adding a couple of wraps of plumber’s tape, and re-tighten. Often that stops the leak.
When putting plumber’s tape on, wrap it in the direction you are tightening. It will tighten more smoothy and not slip or bunch. I always end up thinking “righty tighty” and sometimes dry fit the pieces to make sure I put the tape on the right way. It works for me, don’t judge.
THERE ARE EXCEPTIONS TO PLUMBERS TAPE! If you are connecting a flared or compression fitting, you should not use tape unless you know it won’t cause a problem. Some specialized fittings are tapered or require metal-on-metal contact to seal, and the tape may keep them from closing properly. This is usually with some propane fittings, but not unheard of in water systems.
Tools of the Trade
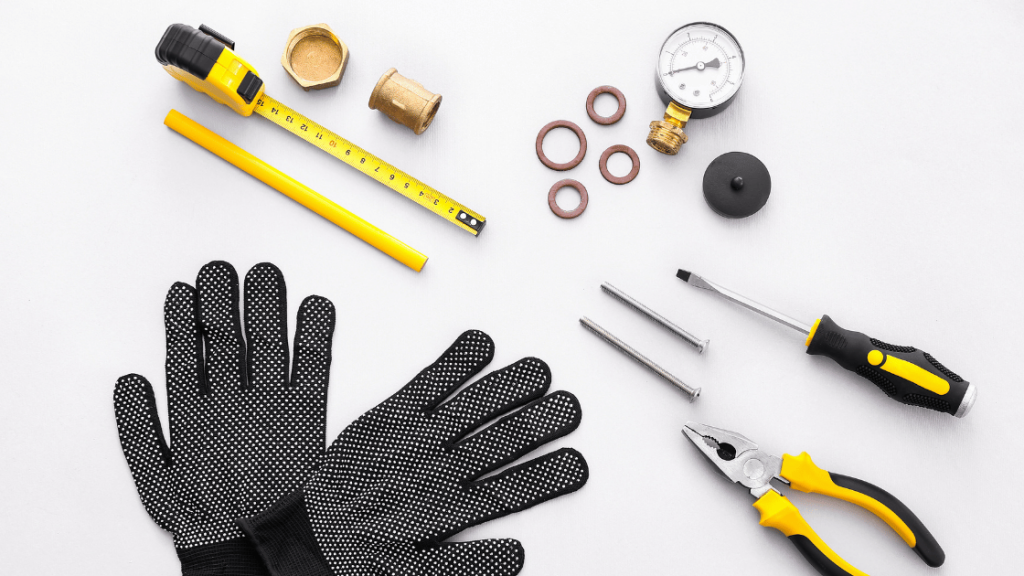
There are a few things you can keep on board to help you with problems if they happen away from the dock. This includes:
- A few lengths of spare hose in appropriate sizes.
- Hose barb “Nipples” for joining hoses. With these, you can splice around a split hose, or temporarily plumb out a leaking device.
- Hose clamps
- Screwdrivers
- Cut resistant work gloves
- While you should own a heat gun, running one on 110V AC may be a problem for many boats so it may not help on board.
- Rescue tape. Self-annealing tape can temporarily fix low pressure leaks in some places.
Troubleshooting
Most plumbing troubleshooting is fairly straightforward if it involves a leak. If you’re lucky, it’s a water leak and you can see a small stain, puddle, or drops to show you exactly where your problem is. Sometimes you can’t see a leak, but you can run your fingers over the hose and the joint to feel for any wetness or cold. Remember than water can travel, so you need to keep checking above the place you first find a wet spot.
Then you need to figure out if it’s a loose connection, or a worn or broken fitting or hose. The most common time to discover a broken fitting is in the spring, after a poor winterization job. So be careful and start slow when you recommission!
If you’re less lucky, it’s an air leak. Some parts of your system rely on vacuum principles, like the pump that draws water from your fresh water tanks. If there is an air leak in the uptake line, it may not be able to draw water. But it may not be leaking water if the air leak is near the pump since it can’t draw water up there.
Again, it can be a something loose or something broken. So the first step is step is to check tightness – you’d be surprised how often a turn on a hose clamp can solve a problem!
Finally, if you’re flat-out unlucky, it’s a black water leak. The good news is catastrophic black water leaks aren’t all that common. Most black water issues are blockages or smells. Hoses get saturated over time and smell, and it’s possible to get some oozing and weeping around the connections that can lead to smells. The best solution in both cases is to replace all the hoses.
If you have black water leaks, they usually happen the same way as fresh and raw water leaks – loose connections or broken hoses or fittings. They’re messier, but you fix them the same way.
Final Words
Operator error causes a lot of plumbing problems. Overfilling holding tanks, improper winterization, and so on. So many toilet problems are caused by flushing inappropriate objects.
Take extra care with guests on board, as they’re the most likely to make plumbing related errors. We used to joke about “potty training” guests on board when they arrived, but a minute spent explaining how to use the head and what not to put in it can save you a load of trouble. (“nothing you didn’t eat or drink first, or pull from that roll there”)
Hopefully, you won’t have any big plumbing problems when you’re out enjoying your boat. But if you do, you can have some idea how to fix things!

November 21, 2023 at 6:10 pm, Lennie Cantor said:
Good article
I am a Navx user