Handy Tricks with Spring Lines
April 7th, 2023 by team
by B.J. Porter (Contributing Editor)
Spring lines are a powerful tool for any boater getting, but so many people don’t use them well. They’re a little challenging to figure out, and when the best situation is for them, but they will make an enormous impact on your in-close boat handling.
We’re not going to re-write the book on it in this article, but hopefully we can whet your appetite enough to get you to dig out a copy of Chapman’s Piloting & Seamanship, the Annapolis Book of Seamanship, or other similar book to read the sections on springs lines and study the diagrams and scenarios.
It’s all about the physics
Remember studying simple machines back in school? Springs are all about using lines and fenders for leverage to impart force on your boat to move it in a specific direction. Running a line from a cleat in an unexpected direction can put a force you’re not used to on your boat, and we’re going to use that.
For example, most times when we tie on, we attach a bow line to a dock cleat perpendicular to it or forward of the boat. If you put the engine in forward and no other lines are on, the boat will move forward until a line aft goes taught.
Now take that line and tie it from a bow cleat to a dock cleat near the stern. With all the lines untied except that one, what happens with the engine in gear?
The boat moves forward until the line is taught, then the bow swings into the dock. Because the bow swings in, the stern kicks out away from the dock. Put a fender up near the bow before you do this to protect it and give the boat something to pivot on, and you have a tool to push the stern off the dock without moving the boat forward. We’ll use this again soon.
Pick your cleats carefully
You’ve got to think about the forces exerted by the lines on the boat. Connecting a cleat on the boat to a cleat near it on the dock, it will hold the boat. But connect it to a cleat near the other end of the boat, and you can put some angular force onto one end of the boat or another. Put a fulcrum in there, and you have a lever to move your boat.
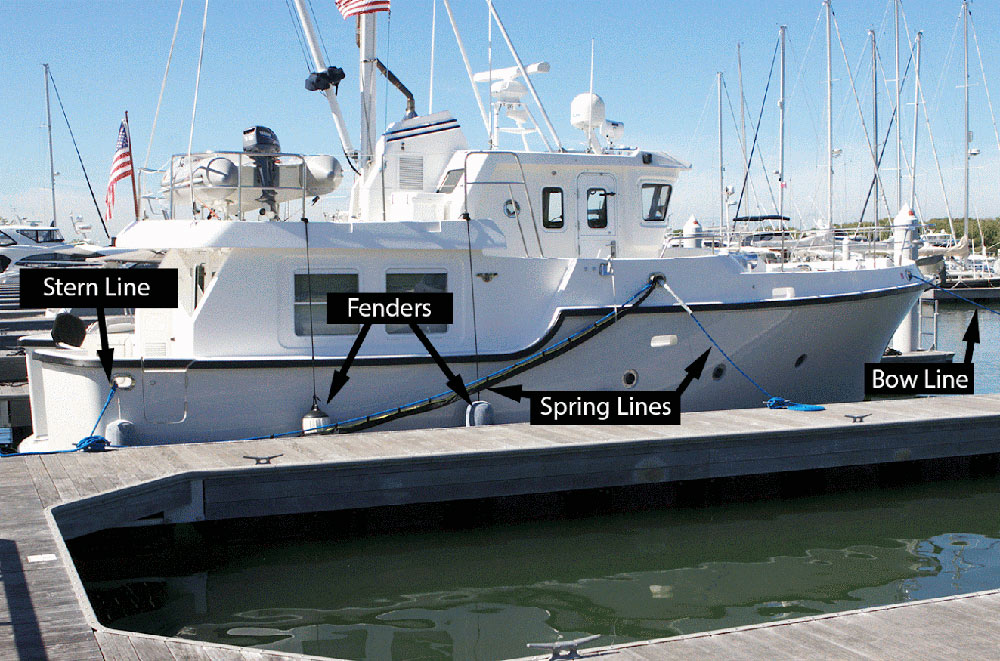
Fenders are key
From our basic science classes many years ago, we learned a lever is a bar with a fulcrum, or a point that the bar could pivot on. It’s the bar under a see-saw.
When using springs on your boat, your fenders do two things:
1) Protect your boat, because your hull is going to get pressed up against the dock.
2) Act as the fulcrum (with a point on the hull) of the lever made with your boat, the lines, and the dock.
The rudder may help
Most sailboats can’t steer without moving through the water. It’s how rudders work – the boat must be moving to turn, unless you have an outboard and you pivot the engine.
But a rudder behind the propeller (like most sailboats have) creates wash over the propeller. You can usually direct that wash a bit like a jet drive to adjust the forces on the stern of the boat.
Mind the wind and current
You’re applying forces to your boat to move it, so don’t forget that the wind and current can add significant force and movement to your boat. You can make it work for you, but whatever spring technique you use should factor in wind and current direction and strength.
Wind off your outboard quarter will hold you on a dock, off the dockside quarter will help you get off. But if you can get the stern past that outboard wind, it can help!
Take it slow
Whenever you’re working in close, make your adjustments slowly and avoid over revving the engine or flailing and jumping around. Spring techniques usually take a little time, since a boat is heavy and we’ve got to overcome its inertia with fairly limited force.
Trick #1 – Parking on the dock with a single line
This technique works on boats with midship cleats, and how we approached docks on our boat. It lets you get on the dock with only one line, then tie up the boat at your leisure. If your boat doesn’t have a midship cleat, it may not work, but experiment with your other cleats.
To prepare, before reaching the dock.
- Rig a spring line to your midships cleat that’s long enough to reach the stern.
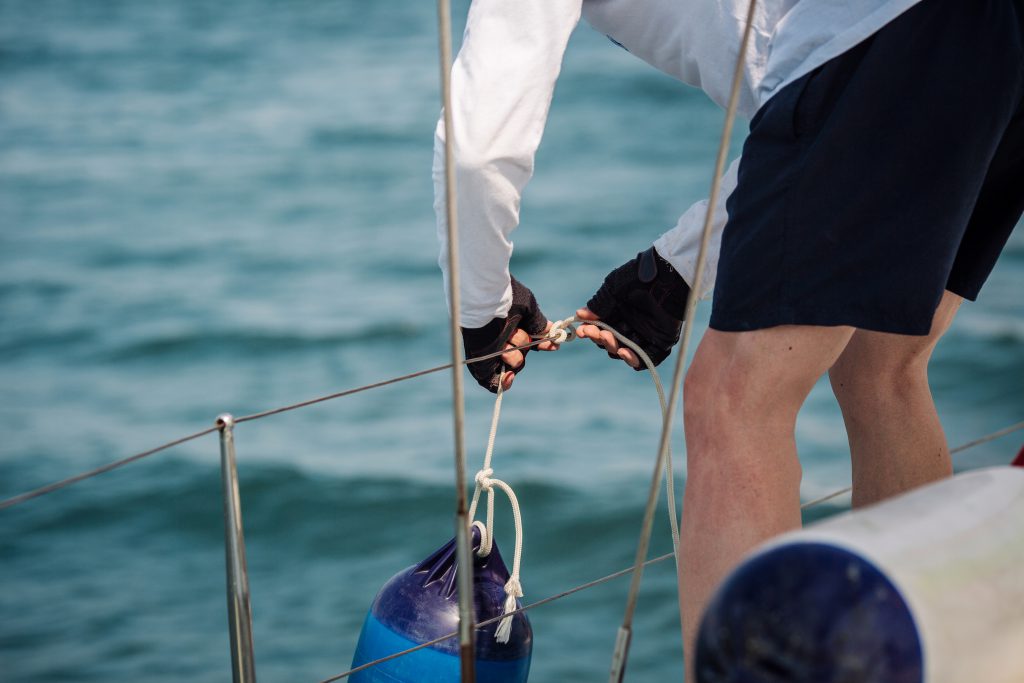
- Put a fender or two at midships.
As you approach the dock:
- Approach the dock slowly, in neutral (or a little reverse to brake you), angling to arrive as close to parallel as you can, moving one knot or less.
- At the dock, tie the end of the spring to a cleat that will be behind midships, as far back as at the stern. You can step off the boat if it’s moving slowly, or direct dockside help to tie it.
- Turn the wheel away from the dock (or the tiller towards it).
- Engage the engine in forward and leave it in gear, running.
Done properly, the boat will then move forward until the spring tightens, then sidle right up to the dock and stay firmly pressed against it. The boat will now stay put with the engine idling until you run out of fuel. You can now tie the boat up with other lines at your leisure, then put the boat in neutral and cut the engine.
If you’ve got lots of wind or current, this takes a little more patience and you may need to push the engine up above idle to stay on.
Trick #2 – Swinging the stern out
So you’re parked on an outside dock with boats right in front of you and behind you. You need to leave, but you can’t move enough far in either direction to get steerageway and avoid hitting the other boats. What to do?
We already described this in the first discussion about physics. It takes a little modification, because you will need to let go of that stern spring line to clear the dock.
- Put a fender up near the bow.
- Put a line on the bow, and loop it around dock cleat by the stern and have someone on the boat hold it.
- Take all the other dock lines off.
- Turn the wheel to the dock (this may give you a little more thrust outwards)
- Put the boat in forward idle. You do NOT want to rip the spring out the holder’s hands with too much power!
- Idle the boat as the stern swings out.
- When you’re clear of the boat behind you, reverse the engine and back off the dock.
- Retrieve the spring line.
If you have help on the dock, they can hold the spring on the cleat, but just wrap it because it will be nearly impossible to untie with load on the line. Make sure when they toss the line that it doesn’t get caught in the prop!
Trick #3 – Swinging the bow out
Imagine yourself in the same situation as above, but the wind and current are different. Here, the breeze is on the bow and a little off the dock, so it’s pressing you on. If you swing your stern out to leave, you’ll increase the angle of the wind on the boat, which will push you back on the dock, so swinging the stern isn’t ideal.
The solution? Stick your bow out there into the wind and get the wind straight on or even past the bow.
This is very similar to the last trick, except in reverse. You run a spring from the stern cleat forward to a cleat on the dock near the bow, put in some fenders on the corner of the boat, and put the engine in reverse.
- Put one or two fenders near the stern – try to envision where it will contact the dock.
- Run a line from the stern deck cleat to a dock cleat up near the bow. Wrap it and give it to someone on the bow if you don’t have dock help.
- Take all other dock lines off.
- Turn the wheel away from the dock.
- Put the boat in reverse idle.
- Idle as the bow swings out. If you have a bow thruster, use it. If it doesn’t swing, gently add more engine.
- When your bow is clear of the boat in front of you, put the engine in forward and motor out.
- Retrieve the stern spring.
Practice makes perfect
Every boat is different, and there may be some key things on your boat that make these more or less practical, like your cleat locations, prop walk, engine type, and so on. So take some time to find an empty end dock and try these all out with your regular crew. Try different wind and current conditions, and port vs. starboard tie-ups. You may find your boat behaves differently on each side.
The best time to learn these techniques is not right when you need them!

April 09, 2023 at 8:53 am, Jeff said:
Thanks for the article! I don’t think the instructions and the pictures are quite in sync. Trick #1 and picture 1 don’t seem to match. Likewise the instruction for where to turn the wheel and the rudder position in the corresponding graphic don’t seem to match. Good tips otherwise!
April 09, 2023 at 12:17 pm, J Mey said:
Helpful tips, thank you
April 09, 2023 at 4:57 pm, Paul said:
It’s a little difficult to see how the photo in Trick #1 applies to the instructions. Also, you kept mentioning that the “boat” has a cleat when it appears the cleat is on the dock, not the boat. Because there can be cleats on the boat too. I’m sure it a matter of being familiar with the nomenclature. For example, instead of saying the dock cleat is midships of the boat, you are saying the boat has a midships cleat. But that doesn’t mean there’s a cleat midships on the boat. English is a fun language.
April 10, 2023 at 2:35 am, Robert Finley said:
In trick number 3, it should be turn the wheel toward the dock.
April 11, 2023 at 1:55 am, Boris said:
Please revise the instructions as they are incorrect in the article. The rudder positions are correct in the images, However the descriptions do not match. In Trick #1 you will need to turn the wheel towards the dock and in Trick #3 you will need to turn the wheel also toward the dock. Thank you.
April 15, 2023 at 5:33 pm, Cecil said:
Actually, #1 is correct. If you turn the wheel toward the dock you will kick the stern out. Turning the wheel away holds the stern to the dock. We’ve been using this technique for years.
April 11, 2023 at 2:18 pm, Barrie Gray said:
Thanks for the pointers
April 13, 2023 at 12:22 pm, Greg M said:
Great article! I can’t wait to see more of these.
The specific steps CLEARLY spell out what we need to do to be successful. I am confused by comments regarding graphics with correct / incorrect wheel positions because I don’t see any specific drawings depicting wheel / rudder position. Your written instructions are spot on.
April 13, 2023 at 12:54 pm, Jim said:
Literally a typo in the first sentence. Add to that the issues printed out by others. Might be first email I’ve gotten from iNav. Not great BJ.
“ by B.J. Porter (Contributing Editor)
Spring lines are a powerful tool for any boater getting, but so many people don’t use them well.
April 14, 2023 at 10:45 pm, Steve said:
It is risky to have a crew get off the boat while it is moving. Safer to tie a loop in the end of the spring line, as the boat slows, and approaches the dock drop the loop over the after cleat on the dock then secure the spring to a midship cleat on the boat and go slow ahead and as the spring line tighens steer the bow away from the dock, and keep motoring ahead and this will hold the boat against the dock and crew can safely disembark and secure the other lines. If using boats permanent slip, consider having a spring line secured to the aft cleat on the dock coil the spring line and hang from a piling so you can just pick up the spring line as you approach the dock and secure to the midship cleat on the boat.
April 15, 2023 at 5:42 pm, Cecil said:
Another version of trick #1: secure the ends of a line from the midship cleat to the aft cleat, leaving a generous bight, outside of everything. Coming to the dock, drop the bight of the line over the outboard dock cleat. Continue forward at idle, wheel turned away from the dock. The boat will cinch up to the dock and stay put while you fix a nice G&T. Make sure you measure the line before you go out to be sure it cinches up before your bow hits the dock. We have a pre-measured line for this purpose.