
Using iNavX with Brookhouse iMux
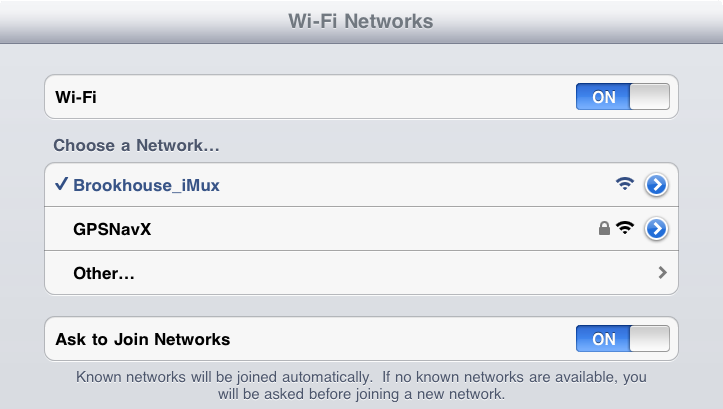 |
Go to the device home screen Select "Settings" app Select "Wi-Fi" Set "Wi-Fi" to "ON" Select "Brookhouse_iMux". If another network is selected, first select the blue disclosure button next to the selected network and then select "Forget this network" If prompted for a password, enter BrookhouseXX (where XX is the serial number of the iMux) Exit "Settings" |
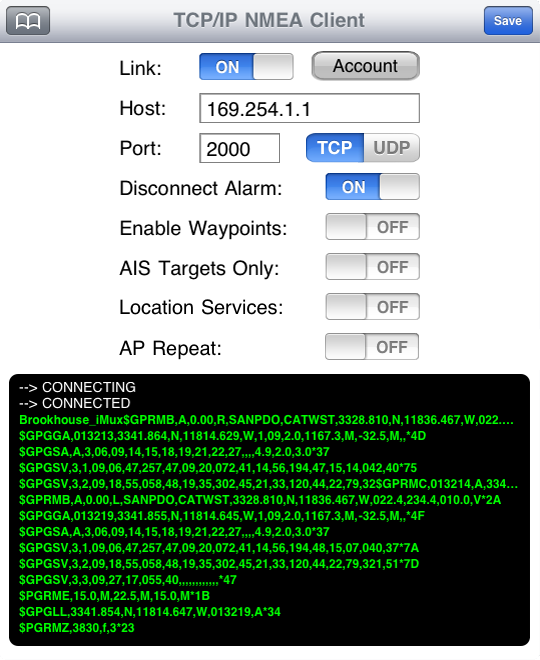 |
Launch iNavX Select "TCP/IP NMEA Client" on the iNavX Preferences menu Enter the Host "169.254.1.1" (Note: MK3 models use "192.168.1.99") Enter Port "2000" (Note: MK3 models use "10110") Select "TCP" Set "Enable Waypoints" to "ON" to import and and navigate to active waypoint or route of the connected GPS receiver Set "Location Services" to "ON" If there is no GPS receiver connected to the iMux. Set "AP Repeat" to "ON" in order to have NMEA data for the active waypoint sent to the iMux NMEA differential (RS422) out while iNavX is running. When "OFF" or iNavX is not running, the NMEA data from iMux NMEA input CH1 will be sent to iMux NMEA differential (RS422) out. Enable "Link" Select "Save" button |
Notes: Connecting iMux to NMEA data. Optional connections: Connect GPS receiver to iMux NMEA input CH1. Connect DSC output from VHF radio to iMux NMEA input CH2. When a DSC distress message comes in, iNavX will create a waypoint at the reported position. In order for this to work be sure "Enable Waypoints" on the TCP/IP NMEA Client setup. Connect other NMEA compatible instruments to iMux NMEA input CH3. Connect AIS receiver or transponder to iMux NMEA input CH4. Connect PC or Mac to iMux RS232. Connect AP to iMux NMEA Differential (RS422) Out. |
|